Okay, folks. So. Tumblr’s jumped the shark in a big way, and I’m not even just talking about indiscriminately blocking all “adult” content on a platform that IS, in fact, primarily 18+.
Many blogs, like the wonderful @blackkatmagic , that are not especially NSFW have vanished.
(And I for one LIKE being able to go to curated porn blogs run by actual people and have a chance of finding stuff to my taste, it was one of the things that kept me on this hellsite, but that’s another issue entirely.)
I know lots of people are talking about migrating, but none of us are sure to where yet. Pillowfort seems to be an option, some people are talking about Twitter. But for now, it’s a mess, and even if we knew where we were going, it’s often a huge process, and a lot of us have stuff on tumblr that ONLY exists there.
One possible quick solution to save your blogs, both NSFW and personal, is to import it to WordPress. I found this solution through from frantic googling on how to save an entire blog, text posts an all. There are several apps for downloading all the pictures from a tumblr, (Plently for Windows, but only a few paid ones for mac, of which Tumbelog Picture Downloader is working for me so far) but this is the only solution I’ve seen so far that allows you to save EVERYTHING. I downloaded my NSFW blog in like 10 min. My regular blog, which is significantly larger, is in the process of importing, but I don’t anticipate any problems. I will, of course, update you if I have any.
This tutorial I found worked really easily. http://quickguide (.) tumblr (.) com/post/39780378703/backing-up-your-tumblr-blog-to-wordpress
I put parenthesis around the .’s like we’re back in FF-Hell, just in case tumblr’s new thing about outgoing links kicks in. You know what to do.
To break it down, just in case:
Sign up for a WordPress.com account at wordpress (.) com/start
You’ll have to create an account, with your email, a username, and a password. They should send you a confirmation email immediately, check it, activate it, and you’re good to go.
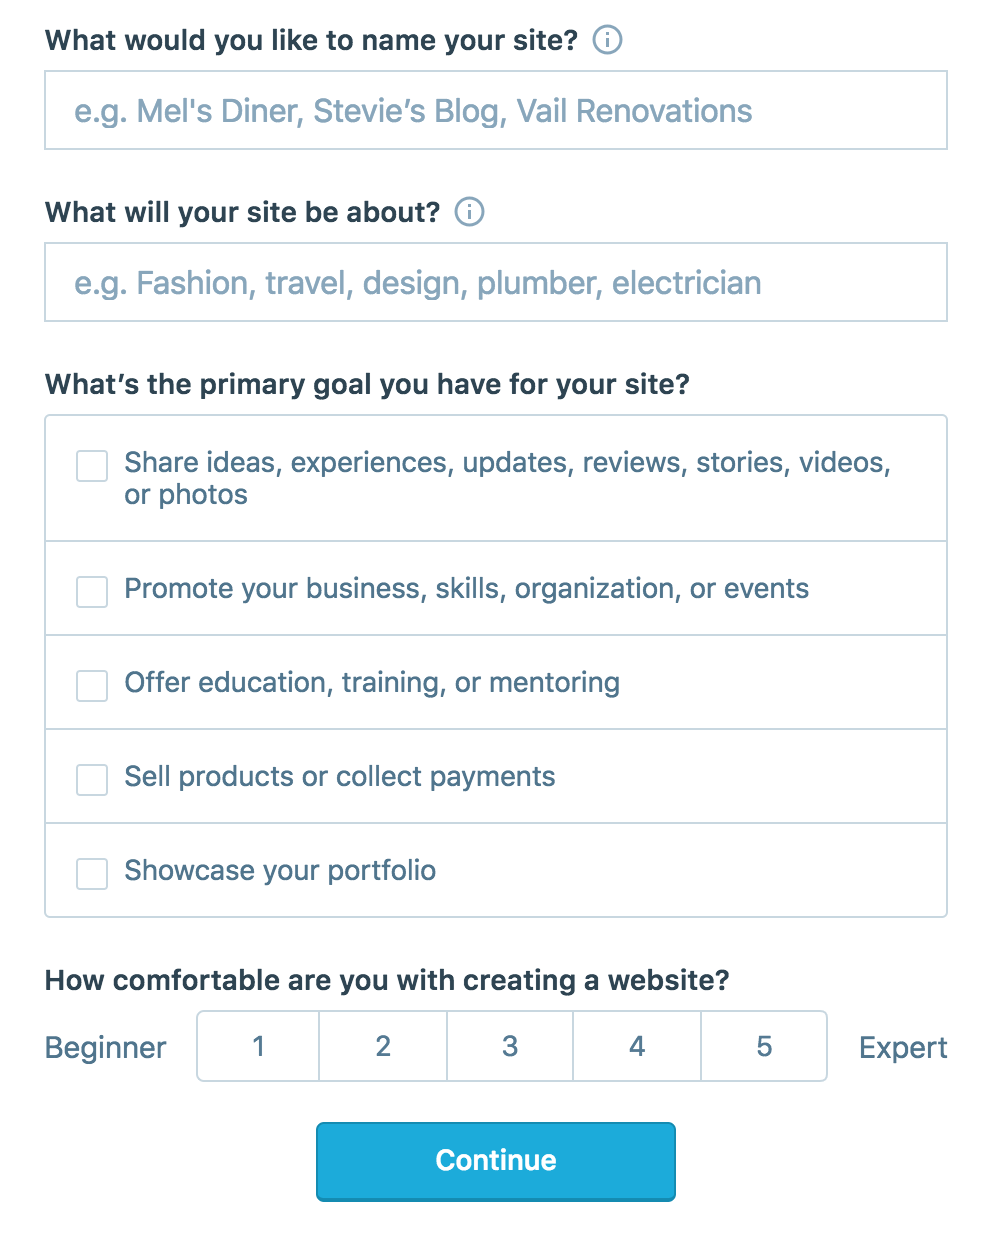
On the site, it will ask you for a site name. That page asks you a bunch of other information too, but you only have to fill out the site name.
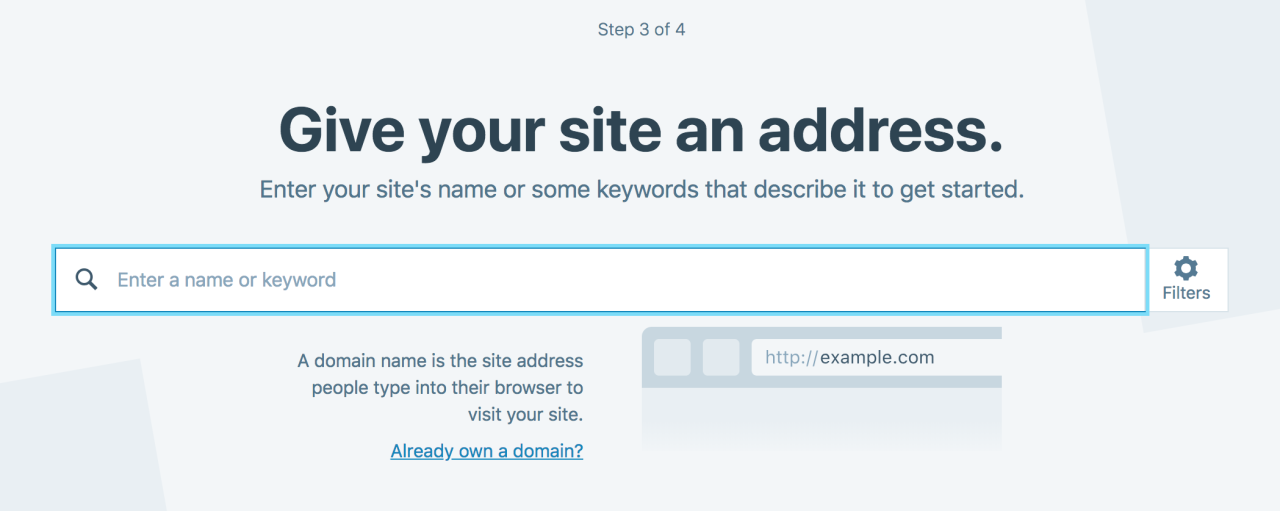
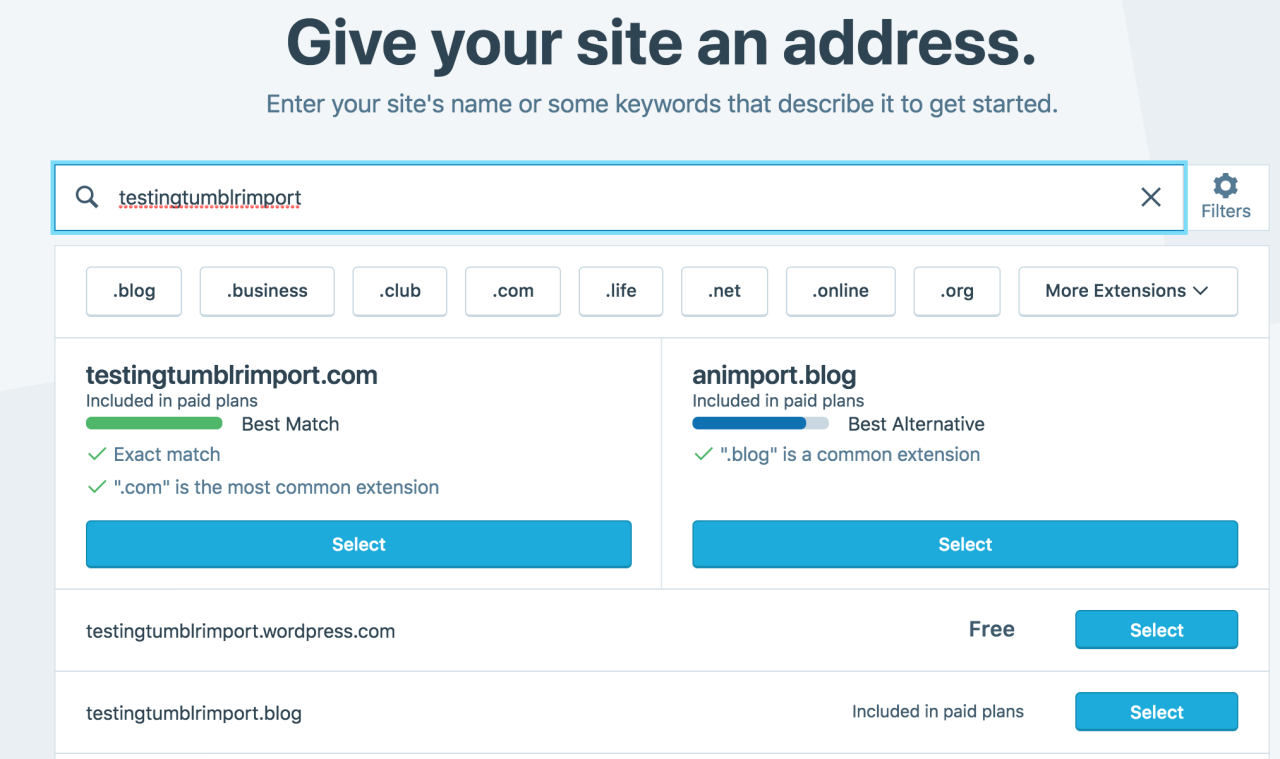
Then you have to give your site a URL. If you’re lucky, your tumblr URL is still available, if not you’ll have to come up with another one, sorry.
It will tell you if that option is still available for free.
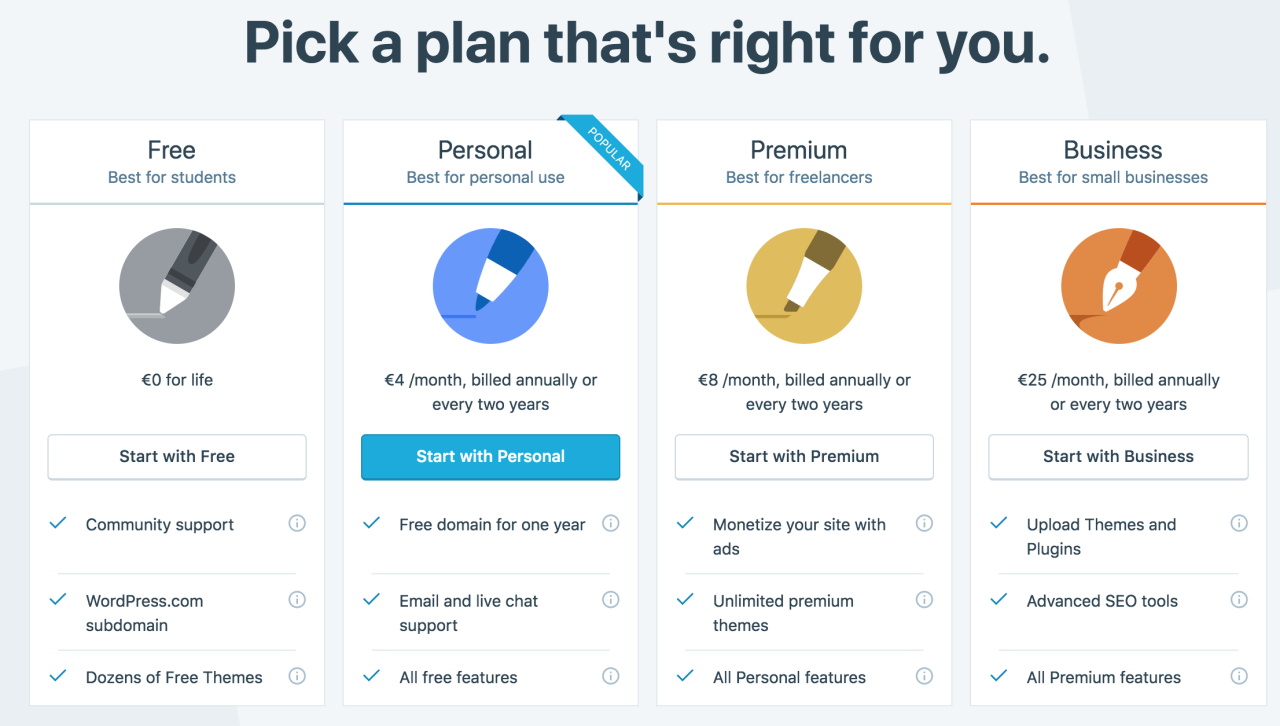
Then it will ask you to pick a plan. Free is really good enough, I swear.
Now you’re set up! You can import your tumblr!
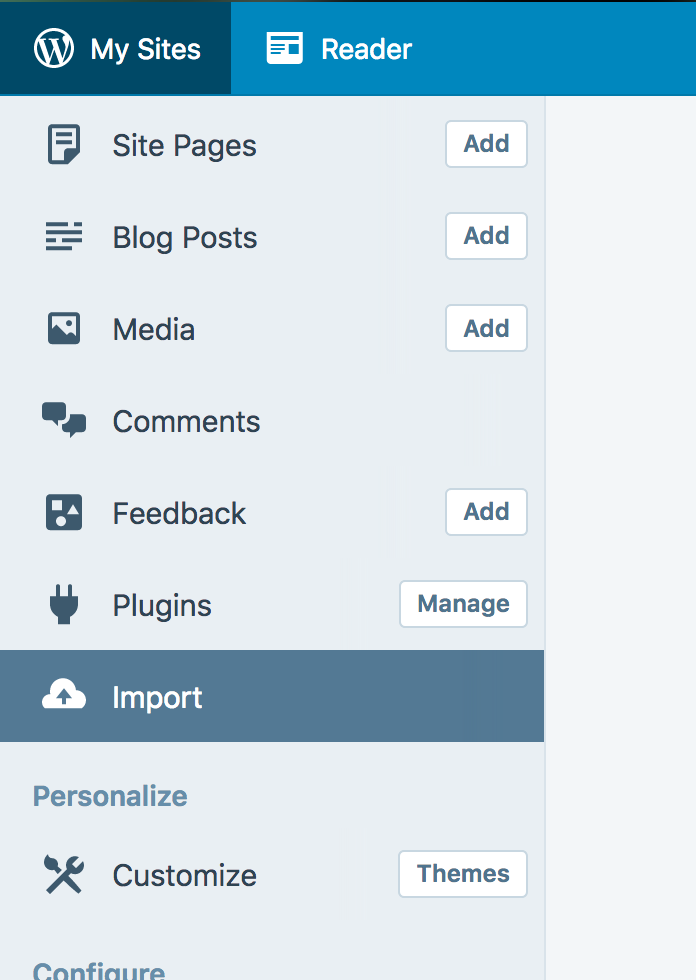
The only differences from the linked tutorial are that the Import button is now on the first level menu, not in tools.
Hit Import, then you have to follow the link for “other importers” at the bottom, to find the option for Tumblr.
Then you’ll have to sign in with tumblr, using your normal tumblr credentials. You’ll be redirected there automatically.
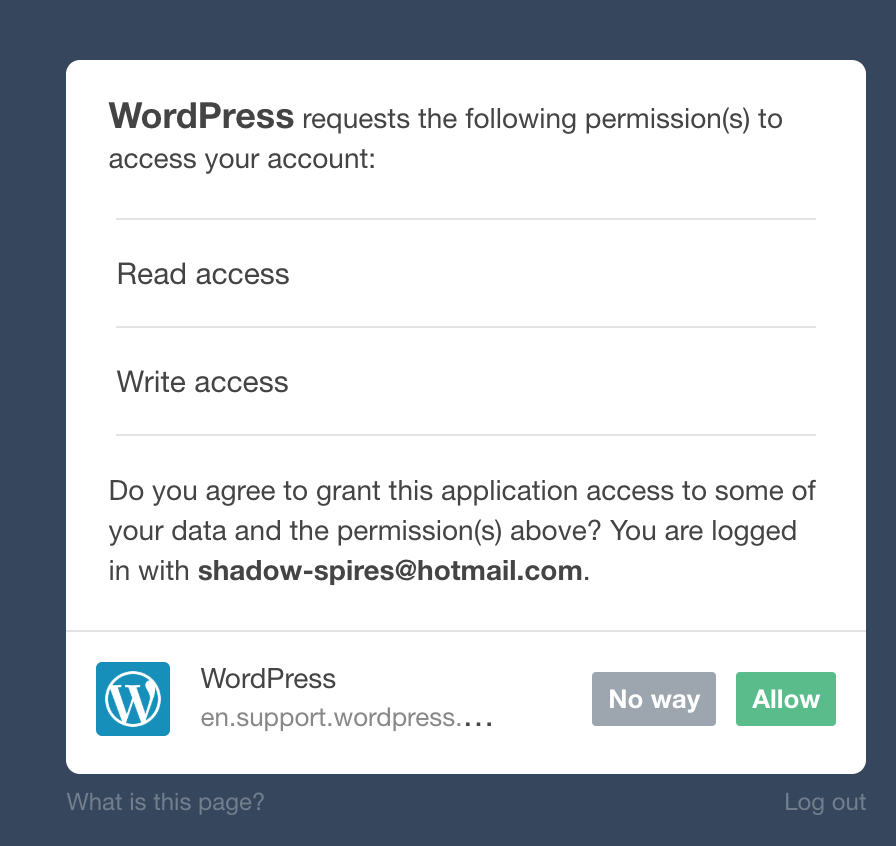
You’ll have to allow WordPress permissions on your blog.
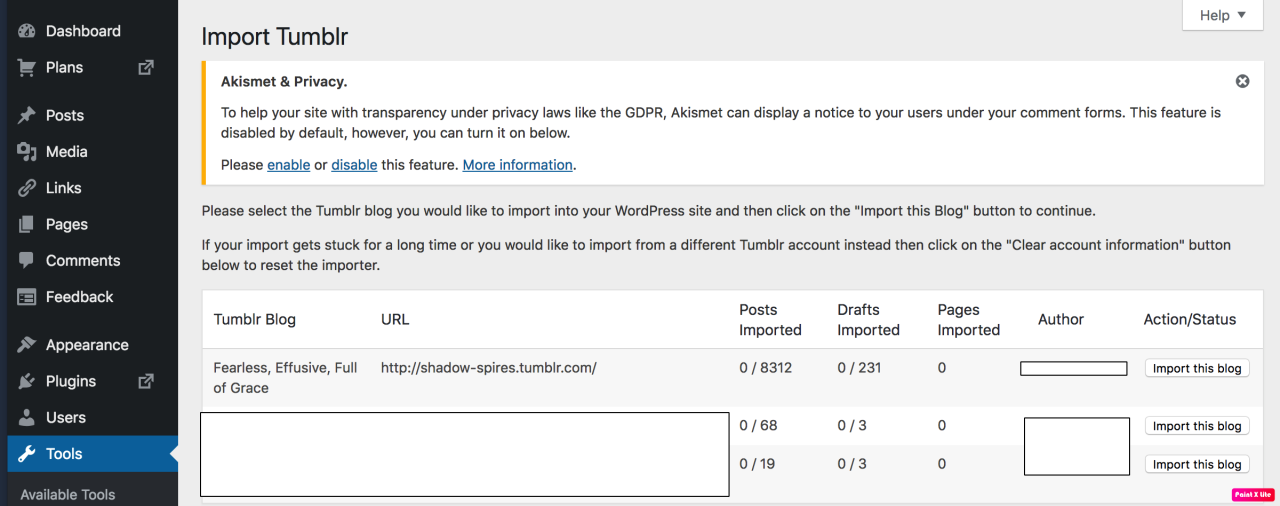
Then your blogs, including all your sideblogs, will show up in wordpress.
Hit import, wait a WHILE depending on the size of your blog, and you’re done!
ALSO!!
I made my NSFW blog private for now, since I don’t know WP’s policy on NSFW.
This means that to access it, someone has to have an account and request access. But hey, part of our problem on this hellsite has been people going places they aren’t wanted, so I don’t personally see this as a bad thing. They can send a request from the landing site on your blog, you get an email, click a link in the email, and PRESTO, they have access.
To make it private, go to Settings > Reading > Site Visibility. Go back and check, it took me changing the setting twice for it to actually stick.
tl;dr, you can import your entire blog to wordpress in just a few steps.
I’m going to tag the hell out of this, in no particular order. PLEASE reblog this and spread the word so people know it’s an option. If you’re having trouble, PM me, and I’m happy to help.
I’ve made a tutorial for @javitrulovesims on how to create a custom Tumblr page, specifically on how to create a Sims downloads page using the Cayla page theme by @ikilledtherpc.
If anyone else is looking to do something similar, this may help you as well. 😊
Lots of pictures and text under the cut! This is a very long post.
Disclaimer: all of this I’ve learned through trial and error, so my HTML skills are certainly not perfect, but it’s enough to get a functional page.
Step 1: Creating a New Page
Go to “Edit Appearence” for your blog.
Step 2:
Scroll down and select “Edit Theme”.
Step 3:
Scroll to the bottom of the sidebar with the editing options. Select “Add a Page”.
Step 4:
Once on the new editing page, go to the bar that says “Standard Layout”. Select the drop-down menu and select “Custom Layout”.
Where it says “yourblog.tumblr.com/url”, enter a ending for the url. For example, I wanted the link to my downloads page to be “emy-the-gamer.tumblr.com/ts4-downloads”, so I simply entered “ts4-downloads”.
If you have the default Tumblr page theme, if you select “Show a link to this page”, it will automatically create a link on your blog to this custom page. If you use a custom blog theme, you will have to edit the theme so that there is a link on your blog that leads to the url you’ve just set up.
Step 5: Retrieving the HTML code for the page
Go to this link to find the html code for the page. You can click on the “Preview” links to see an example of how this theme will look. Then, click on one of the links (underlined in red) for the theme you prefer (for my blog I chose the one without the header).
Step 6:
The link will take you to a page like this. Copy all of the text in the box (there is a lot).
Step 7:
Paste that text in the grey box on the editing page. Hit the “Update Preview” button. You’ll need to hit this button every time you make a change to the code to see the change come into effect.
Step 8:
After hitting update preview, your page should look like this. Now you can start editing the page to make it your own.
Look out for comments like these in the text, @ikilledtherpc has put instructions in the text that are very helpful and will help to show you how the code should look after you’ve edited it. In this particular instance, this line of code changes the title of the page (which comes up at the top of the browser window, on the tab).
Step 9: Editing the Top Bar
Scroll down until you find this section (it is a fair way down the page):
This section is where you edit the top bar. This has the title of your page (which can be whatever you’d like), an optional subtitle, and a link back to your blog’s home page.
Here you can see where I’ve made changes and how it affects the page after I hit “Update Preview”. Where I’ve made changes is where you need to write what you want your title to be, your subtitle, and your home link, as well as where to put your blog url so that the home link works.
If you don’t want a subtitle, all you have to do is delete the text that says “TIP: You can use combinations of filters to narrow down your character search.” and leave that area blank. If you later decide that you want to add in a subtitle, simply type whatever text you want in between <span> and </span>.
Step 10: Editing the Side Bar
Now we’ll move on to editing the side bar. This is a really cool feature of this page, there are filters that can be used to find a specific type of CC, depending on what you set as your filters.
Pay attention to this comment! This comment outlines important things to remember (such as not deleting the code for the “All” button, which would result in the filters being unable to reset), and shows you how the code for the filters should look.
Here you can see how I’ve changed the code, and how it changes on the page after hitting “update”.
To change the title of a category, type what you would like it to be called between <h1> and </h1>. As I note in the picture, I also change the data-filter-groups=“(text)” to match the heading of the category, mainly for simplicity’s sake. It doesn’t seem to actually affect anything (this is where I feel like my passing knowledge of HTML is apparent 😅. Hey, as long as the page works, that’s all that matters 😉)
The second part is changing the filter names and filter tags. The tags will be used later, so make it something that is easily remembered and that you associate with the filter name (for example, for CC that I’ve made for toddlers, it’s tagged with “.todd”). The tag does not have to match the filter name. The tags are in green, while the filter name is in white.
Here you can see an example from my downloads page:
Step 11: Editing the “Grid”
This will be the main content of the page. These squares will contain links to your cc and pictures of it, and these squares will disappear and pop up again with the selection of the tags in the side bar.
Again, pay attention to @ikilledtherpc’s comments! This will help keep the page functional and looking nice.
Here you can see how I’ve edited the code.
The title of the square goes between
and
(the white text).
The subtext of the square goes between
and
. You can leave this section blank if you choose.
After <a href= put a link to your download in between the quotation marks. This will create a link to the download through the user clicking on the circular picture.
You can also see after <div class=“grid-item that I’ve put in some example tags. Say you’ve uploaded a dress for female Sims, you might tag it with something like .dress and .fem if you’ve set those tags up in the filters during Step 10.
Step 12: Putting Pictures in the “Grid”
In order to have pictures in the squares, you will need somewhere to upload those pictures to. I have a Blogger account that I upload to, but you could also make private posts on Tumblr to upload the pictures.
The pictures need a resolution of 360 pixels by 360 pixels. You can use a photo editing program to set the size of your photos.
Once you have the picture uploaded, right click on it and select “Copy image address”.
This will give you a link that is ready to be pasted into the code.
After <img source= paste the link between the quotation marks. The picture should appear after you hit “Update Preview”. Remember, if the post or blog on which the original picture is posted gets deleted, the picture will no longer show on this page either.
Here is what the code for my downloads page looks like after I’ve edited it.
Step 13: Changing the Colours
Finally, we come to the final part; choosing the colours of the various elements on your page.
First, you will need to Google “colour hex picker”. Through this you can choose whatever colour you prefer, and it will tell you the hexadecimal code for that colour. You’ll need to put this hex code into the HTML for that colour to show up.
You’ll need to scroll up to the top of the HTML code. From there we can work our way through and I’ll show you where to put the hex codes to changes certain parts of the theme.
Scroll Bar
This section changes the colour of the scroll bar.
(Removed a picture of the scroll bar because the scroll bar is very thin and the picture ended up looking very strange on mobile. The scroll bar consists of a thick line that scrolls down a thinner line on a different coloured background, default grey scroll bar on a white background)
The top part of the code changes the colour of the thin line at the back, while the bottom part changes the colour of the thicker part. These don’t have to be the same colour.
Top Bar/Side Bar Headings
(Note: in the pictures I refer to the top bar as the header. While writing I realised that this may be confusing as the other page theme option has a floating header in addition to the top bar. In all of my pictures, where I say “header”, I mean “top bar”)
This part changes the colour of your top bar and the text in it, as well as the colour of the headings in the side bar.
.toptitle refers the title.
Under #top, background refers to the colour of the top bar, and color refers to the colour of the subtitle text.
h1 refers to the headings in the side bar.
Home Link
.return refers to the link back to your home page.
Under #top a:hover you can select a different colour, so that when the mouse hovers over the link, the colour of the text changes.
The Grid
Here is where you can change the colours of the squares in the grid.
“background” is the colour of the box (I’ve chosen aqua blue in my case). “colour” will change the colour of the text.
Side Bar
Under .sidebar, you can change the colour of the background of the side bar.
Mine is still the default white (which the colour that the code #fff refers to. Black is #000).
Page Background
I’ve been more or less going in order through the code, but I skipped the colour of the page background (which is near the top) because this one requires an extra step.
Under “body”, you will have to enter a new line of code. Hit “enter” to make a new line, and type “background:”. After this type in your hex code of choice as with all of the previous colour changes.
Done! 😄
That is the basics of using this page theme to create a Sims downloads page.
Apologies for not covering the option with the header, as I stated before, I chose the page theme without the header, however @ikilledtherpc has included comments in the code for the header theme as to how to edit the header.
I also apologise for not going over how to set an image as a background like I have on my page. That was a little more difficult, as I had to write new code for that to work, and it was a painful process getting it to work properly, and would probably be too much in a tutorial like this which already has a lot of information to take in.
(Extra little disclaimer – I was writing this between midnight and 2am so if there are spelling mistakes or misplaced words, that’s why 😅)
As of today, November 17, 2018, any post with links, any links, even to other tumblr posts, just don’t show up anymore in tumblr’s search engine.
I just found out about it, after I posted a fic with a link to my masterlist and it got little to no notes (it shuldn’t). I was right – the moment I deleted the links, my post magically appeared in the search again. Wow.
Please spread the word to warn the others.
This affects artists who want to cross promote their work, writers who want to link to previous chapters or to a masterlist, and editors who want to link to their YouTube channels, among just a few. This new policy will kill content creators’ ability to spread their work, and for what? A poor attempt to use the algorithm to crack down on porn bots and scammers? Sad.
In the meantime, here’s what I suggest: post your work with no added links, and tell people to check the notes for your masterlist, story navigation, links to ko-fi, patreon, and other social media sites. Make sure you have all those things ready, then paste it into a reblog and have people access them that way. It’s stupid, but it’s a work around we’ll have to use until tumblr gets their act together.
Reblogging again because I need advice on creating masterpost links.
Paved with good intentions since pornbots use links in their posts, unfortunately they are hurting artists and source givers
How fuckin irritating. Soz pol fans, imma have to change the format a lil to accommodate this bull fuckery
The feel when you finally figure out how to change a custom page’s code to get it to do what you want. 😎
(Explanation below cut if you’re curious)
I was trying to add text to the header on my downloads page, which had been in the original code but I’d removed it.
However, changes to the code weren’t doing anything and the FAQs on the theme creator’s blog weren’t helping.
Looking at the original code, I worked out that I had previously written a section of completely new html to put my own header in there instead of the original, specifically because at that point I didn’t want the text from the original header, just a title, and then forgotten that I had done that. 😅
I’m back from hiatus, and I’ve got some cool things coming up. 😉